You are so fabulous

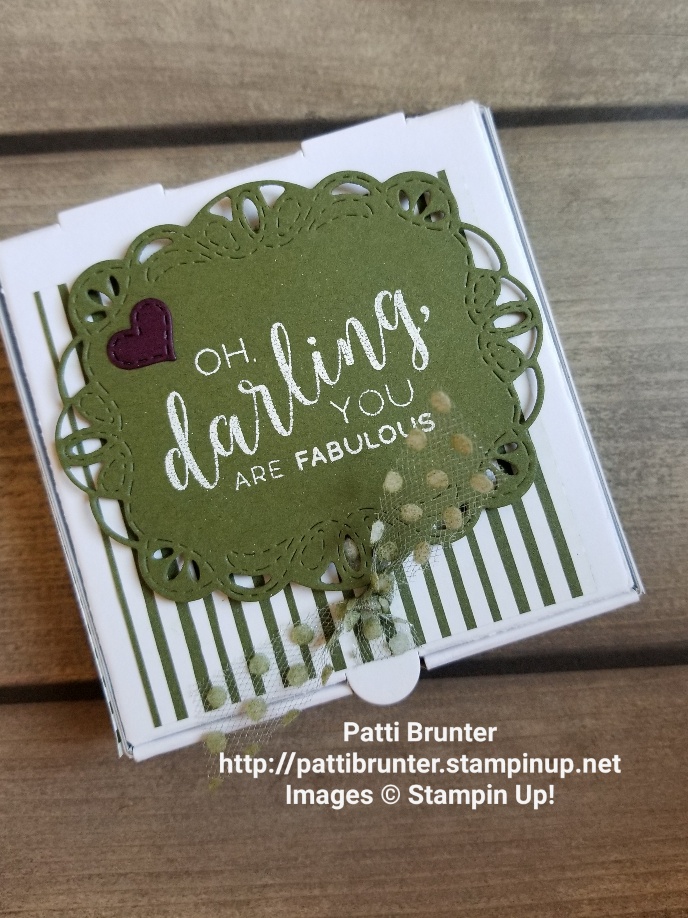
Don't you just love the new stitched all around bundle! I had so much fun playing with this set and this is just the beginning. I created a gift for my stamp club hostess using this set. It was the first time that I had inked the set up and used the dies.  And now I can't wait to use it again! The greetings in the set are so beautiful. I love the fonts and they go so well with the framelits. I used one of our pizza boxes for the small 3 x 3 cards that I placed inside. I used Mossy meadow cardstock as well as the designer series paper for the outside of the box, heat embossed the sentiment and sponged a piece of the white polka dot ribbon with mossy meadow ink.


 I kept the cards very simple. After stamping I used the framelit to cut out and then punched a small coordinating color of cardstock to mat behind. I decorated the envelopes with another stamp from the set.


This really is a quick and easy project to put together. Hopefully my hostess liked the gift! I always like to spoil my hostesses because I really do appreciate them opening their homes up to have our stamp club. I also do appreciate all of my club members! I hope that they know that it is because of them that they make my job as a demonstrator so fun!


10 FREE INK PADS!


What a great time to sign up to be a demonstrator!  A set of ink pads for FREE with your kit. You can pick any family color that you would like. That is a $67.50 savings!  Wow!! Contact me if you have any questions or would like to join my team!

Tickled Pink

Hi Everyone! "Tickled pink for you" is such a sweet greeting to put on a card for a baby girl card. I was so excited when I saw the greeting in my fabulous flamingo stamp set! I had made a fancy, glittery baby girl card for a friend of my son and his wife and I knew this went perfect with it. Who doesn't love everything pink with a beautiful baby girl! For the first card I used the apron builder framelits to create a little bib.


 For my next card I used the new Sweet Baby stamp set and had fun with my watercolor pencils and blender pen to give this little girl a pink outfit and finish her with a cute pink bow.  I am having so much fun with this set. And then when I saw the white polka dot ribbon, I just couldn't not add that as well.


 Have you noticed in the new catalog some of the fun ideas that they have included?  I found on page 48 their suggestion is to soften the color of the cardstock to brush your whisper white ink across to create muted, subtle look. I knew I wanted to try that and so I thought this was a great time. I love the look that it gave to the melon mambo color. Softened the cardstock to create a nice background to my little baby card.


Check out the other suggestions in the new catalog, find one you would like to try and let me know how it goes.  I would love to hear about the new creations that you have found in the new Stampin' Up catalog. Have a wonderful  and safe 4th of July!

Sweet Baby

Finally, I have had some free time to create with my new goodies from the Stampin' Up new catalog! Sometimes I find that it is overwhelming when I get all kinds of new things and don't know where to begin. However, I fell in love with the new Sweet Baby set right away. The images as well as the font used for the greetings are so adorable and I always love an excuse to do some coloring. I started by stamping the images with my staz on black ink pad on shimmer paper so that I could do use my watercolor pencils and then I stamped the images on white cardstock with my memento pad so that I could do some coloring with my stampin blends. (I am so excited for the new colors to be released soon- I will let you know as soon as I find out) I find it so relaxing to color and so I took my images and sat outside enjoying the beautiful California weather and began to color. I like to cut out all my images at once and then create my card.


Aren't these images so adorable! I CASE(d) the card in the catalog for my first card, page 89. When I first saw this bundle I did not notice the cute lace trim in the framelits. I will be using that for many cards in the future!  It is so pretty! The new 6 x 6 designer series paper is also a must have!  Who can resist polka dots and stripes!  I used the neutral pack for this card because I wanted it to match the jumper for the baby. Since I have not used my watercolor pencils in a while, I decided to pull them out with my blender pen for a soft baby look.

I hope you enjoy this card! If you or anyone you know is having a baby soon let me know. I would love to send them a card. Just leave me a message and I will get back to you. If you would like to order the sweet baby bundle to receive your 10% discount let me know.  Have a beautiful day and I will share more sweet babies soon!

Fear Not!


Hi everyone, I hope you are all having a great day!  For the card I made today I picked the Rose Wonder Stamp Set. I am so sad that this set will no longer be available for order after May 31st. I love this large rose image.  It is really fun to color as well as because it is so large you do not have to do much else to make it into a card. The coloring options are endless. For the first card I started with a piece of the shimmery white cardstock and stamped the rose image in grey archival ink. I used my aquapainter with Stampin Up dye based ink pads to color.  For the rose I started with a light wash of daffodil delight and then when that dried I added calypso coral and a little pumpkin pie in the center where I thought the flower would be the darkest. For the leaves I used the same technique and used old olive and artichoke for the darker color. After the entire piece was completely dry I added speckles by putting some smoky slate ink on the corner of my acrylic block and then using the aquapainter to flick color from the block.  I kept the block a fairly far distance from the paper because I wanted the specks to be small. I decided I wanted to keep the card flat so that it would be easy to mail and so I made a quick watercolor wash with marina mist in the corner. I knew that I would put the sentiment there.  I stamped the sentiment on when it had dried with staz on black ink. The sentiments in this stamp set are so beautiful for when you need a card with an encouraging message. I will continue to use them for a very long time. To finish the card off I used a few of the glittery clear drops from the occasions catalog. I was really hoping they would continue to offer these in the new catalog because they really come in handy when you need a little something. But since they will be retired you will want to get them before they are gone. The entire piece is just a little smaller than standard card and I mounted it on to a piece of artichoke card stock.

For the next card I watercolored the card in a similar way however, I used watercolor paper as the base and white heat embossed the image.  Using heat embossed images makes watercoloring a little easier.  It doesn't bleed into the other areas. The background I did a very light color wash of marina mist. For the flower I used pale plum and with each layer I used a more concentrated amount of color (less water) for the leaves I used old olive, and a little bit of daffodil delight. The sentiment I stamped in staz on black ink and a few speckles of pale plum. I mounted the entire card on pale plum card stock.

I hope you enjoy these cards. Remember the retired list will only have items available until the end of May.  Many things have already sold out, so if there is something you would like make sure to get it while it is available.  If you do not have a demonstrator I would love to help you in anyway that I can.  Have a wonderful Memorial Day weekend!

Welcome to my new blog


Hi and welcome to my new blog.  You will have to bare with me as I learn how to use my new blog to bring you fun new stamping ideas.  If you have any suggestions on how I can improve please do not hesitate.  I look forward to hearing from you and learning.  For my first entry I have a fun easy project using the new (to Stampin' Up) product, Brusho.  I am so excited to play with this product.  It really is fun and while playing with it I felt like such an artist.  Brusho is fine watercolor granules that when they come in contact with water spread and make beautiful colors.  For this card I kept is very simple.  I took a piece of watercolor paper and using one of the SU pattern party decorative masks, spread a thin layer of embossing paste on the paper.  I let that dry and then took my aquapainter and spread water generously all over the image. I then sprinkled the Brusho yellow all over.  The water did all the work for me. I let that dry completely and then added more water to the center because I wanted the center to have  more concentrated color and stand out a little more.  I then let that dry however it was still not dark enough for me in the center and so I added a very little amount of red.  These little granules are so potent that you do not need much.  Try adding a little and then you can always add more. I was very happy with the results at this point so I decided to keep it simple.

When I was looking for a sentiment to put on the card I immediately thought of Just Add Text stamp set.  It really spoke to me about how I was feeling after playing with this new media.  I stamped it on a white circle, that I had cut out for a previous project but hadn't used, and rubbed a little ink so that it would blend in. I mounted the card on a piece of daffodil delight paper and kept the layout very clean and simple.  I hope you enjoy this and I would love to hear any comments you may have.  Thanks for visiting and have a beautiful week!