Beautiful days!


Hello and welcome to my blog! If you are new to my blog I invite you to leave a comment! I would love to hear from you and what you think of my cards and my blog. For the card today I have been practicing my watercoloring again. I am currently doing the 30 day coloring challenge started by Kathy over at the daily marker website. She is an amazing colorist and I have learned so much from her. I have always loved to color and what a wonderful thing to give my self permission to color each day. It doesn't have to be for a long time but enough to relax and enjoy the process. Sometimes I find that I am hard on my myself and compare my work to others and so I am really trying to enjoy the process and relax and color. For this project gold heat embossed one of the flowers from the  perennial essence bundle.


I gave the old school try on the watercoloring of the images. I know that I need a lot more practice and I am learning so much from the experience. I think I got a little too dark with the colors and needed a little more highlighted areas to really make this flower pop. I tried adding some white highlights with a gel pen but I am not sure that it really helped.


The sentiments in this set are beautiful! I gold heat embossed the one that I thought looked best to fit on this card. Let me know what you think about the watercoloring of my flower. I would love to have all the input possible to help me grow in my watercoloring. Thank you so much for visiting and have a great day! Enjoy!
Water color petals


This will have to be quick post for today. I am still enjoying my "coloring time" and wanted to share my card for today. I started by silver heat embossing the petals from the perennial essence bundle. This bundle comes with a great punch that coordinates with this stamp. I made 2 sets of petals to stack for a 3D effect. I water colored the petals and I really like the colors and how they blended. It made the most beautiful color!


I used the stitched label die to cut out a base for my sentiment and continued the silver heat embossing. I was afraid that you would not be able to read the greeting but I was pleasantly surprised that it showed up nicely!


I did not want to leave the background completely white and so I sponged on some balmy blue with my brick looking stencil. I thought turning it sideways would give it a different look and I was very happy with that but after putting the card together I decided that I think it would have looked better if I used a soft green in the background. I think the blue just didn't really go well with the rest of the design. Have a beautiful day! Enjoy!

One last dog

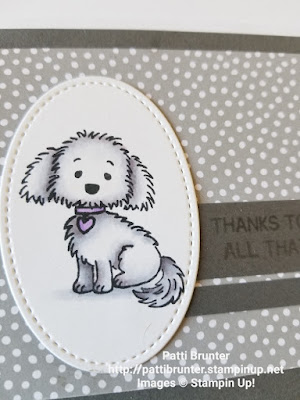
I found this card the other day and realized that I have not posted a picture of it. I could resist since I think this little guy is so cute!

Most of the things used to make this card have retired but you could use any designer paper and any shaped image to recreate this card.  It is a simple design and so quick.


I used my stampin blends to color him. If you use the smokey slate blends just on the edges it give the appearance of shadows so he looks white. (of at least that is what I was going for) Let me know if you think that it was successful? The greeting is from another set that retired but you could use any greeting that you have. If I was to make this card again I would white heat emboss the greeting to make it pop a little more. I think it gets lost on the grey color card stock.


The collar is a soft highland heather stampin blend. This color is so nice and soft!

 Thank you for visiting my site and I hope that you have a wonderful day! Enjoy!


Not typical Iris colors

I love the new iris stamp set in the annual Stampin' Up catalog that was just released.  It has so many cute sentiments and the images are so pretty, so I couldn't wait to play with it! But I wanted to make the iris's not your typical colors. So I switched it up a little. I went with one calypso coral and the other daffodil delight. What do you think? 


I thought that the flowers needed a frame around them and so I had a scrap from another project that I didn't use that would work perfect. I embossed it with the wood plank embossing folder and kept it all white. I stamped off the flower images and lightly stamped them so that it would look like there was a field of flowers behind them. I am not sure that it really comes across that way so I will have to work on that in future cards.


The "thanks" stamp has the perfect arch to frame the top of the oval, so I stamped that before I embossed the frame. Check out the Inspiring Iris stamp set in the catalog!  You will love all the images and sentiments. A great set for all occasions! Enjoy!

Sail into Summer


You can now order the new sail into summer paper pumpkin kit.  It is going to be a great kit. With beautiful cards that coordinate with 3 different suites from the new catalog.
Woven Threads pg 13-14
Garden Lane pg 40-41
Come Sail Away Suite pg 144-145
With all these amazing sets how could the cards not be so cute? If you would like to order please use the following link:
https://www.paperpumpkin.com/en-us/sign-up/?demoid=17603

Have a great day! 

Magnolia Lane!


I think that this suite will be the most popular in the new catalog. It has everything, amazing stamps, dies, designer paper, embossing folder, embellishments. A fantastic set to color in anyway you like. The possibilities are endless. I have scene so many beautiful cards made with this suite already! If you would like to see the suite check out my online store, or if you are like me and like to look at the actual hard copy let me know and I will send you the new catalog. Enjoy!

Brand new Catalog!


So excited to offer a new catalog to all my customers!  There is something for everyone in this book, along with amazing examples to inspire you to create! My first order arrives today and I can't wait to share with you all the fun new items! Let me know if you would like to receive a free catalog from me. Enjoy!

Grads x3

I needed 3 graduation cards, one for a high school, one for college and one for masters. Wow, how often does that happen?


This is a photo of the 3 cards I made. The front card is for my son who just finished his masters degree in divinity. It is a very intense degree with over 80 units to take and he did it all in 3 years. We are all so proud of his hard work and dedication and can't wait to see what God has planned for him to do with his life! 
On to how I made the card. I used the large number dies as well as many sets that either are retired, paper pumpkin or current. I realized when I sat down to make the grad cards that I have no sets for graduation. Amazing that of all the sets I have none for this occasion. So I mixed and matched.


The next card is for one of my stamp customers who's son graduated from UC Berkeley. He is a gifted and extremely smart young man! His mom was one of my first stamp customers and has become an amazing friend in the last 20 years! It is so fun to see the children grow and hear about all their wonderful accomplishments! I know that he will do wonderful things in life as he heads to Arizona for his masters! For his card I used the negative space from the numbers that I had cut out and embossed them with the star embossing folder. I looked up the colors for his school and tried to customize it for him. 


The final card was for my daughters friend who graduated from high school. I love the girl from the wonderful you stamp set and was so excited when I saw that the graduation hat I had from a paper pumpkin kit was the right size for her head. I love how it came out! I also looked up the colors for her school and customized for her. The paper pumpkin kits really come in handy when I need that one little stamp that I don't have. This card is such the case. I also used some of the retired designer series paper for the background keeping the focus on the grad girl.
So when you are trying to make a card for that special occasion make sure to look through all your things. I know that I tend to want to play with all the fun new products and sometimes forget that I have so much more that can be utilized. It is also so rewarding to mix and match to make a new creation.
Congrats to all the grads out there!  Be proud and enjoy your day!

You are the Best!


How simple and encouraging this is sentiment! (from the picked for you stamp set) Letting someone in your life know that they are the best version of themselves.  That is all we can ask for, if you ask me!  I also think that the pets in our lives are the best as well.  They are so comforting when we need consoling and no matter what we look like or how we feel they love us!  That is the best! 


Only a few days left to order the Bella and friends stamp set. I think it is one of my favorite stamp sets of all time. I love the sweet faces on the dogs! I keep this card pretty basic. I used some of my scraps from the neutral designer series paper pack. If you like these designs make sure to grab them now because they are changing the designs in the new catalog.  I added a little pop by adding a few sequins and a doily.


After I stamped the dog with my momento stamp pad I used the stampin blends to color in my little friend. Who wouldn't love to get a card with that little sweet guy on it.  Have a great day and be your BEST!  Enjoy!