Collecting seashells


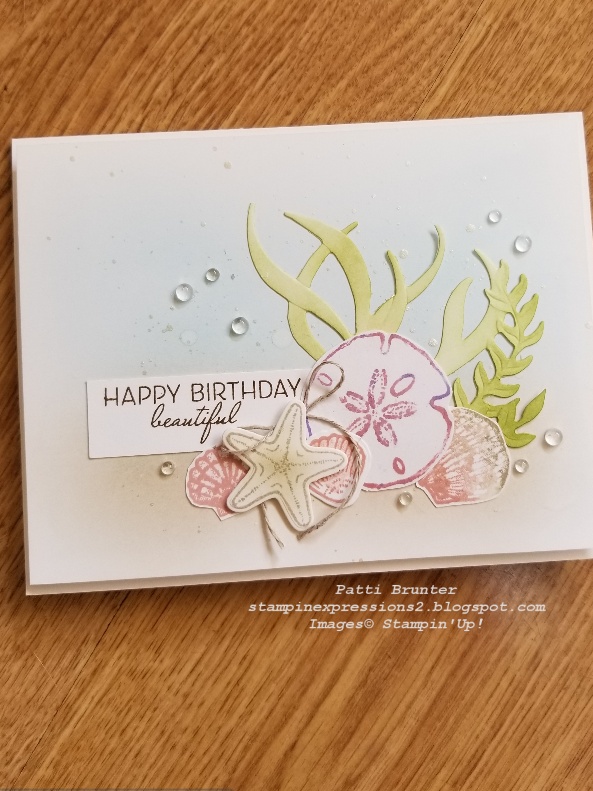
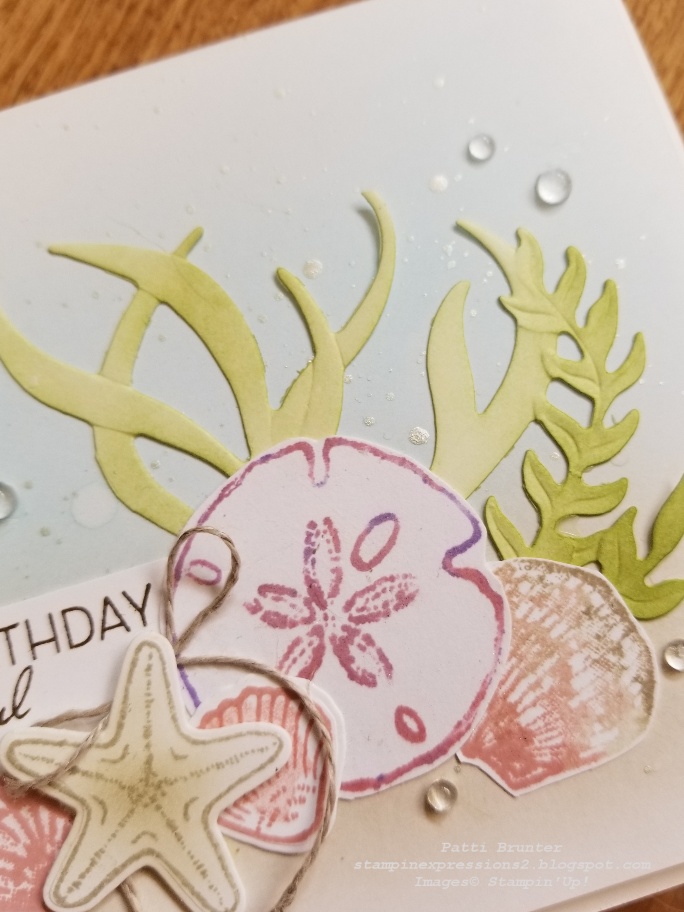
Hello and welcome to another simple Sunday. I am so glad that you are here. Today's simple card looks anything but simple, yet it is and so stunning! I am really having fun creating the shells!


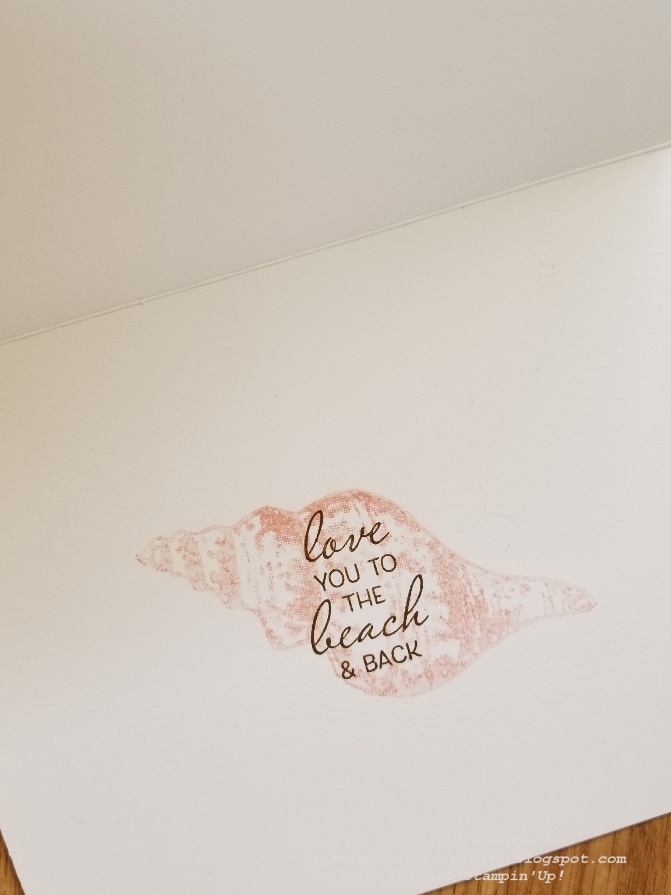
I began with the large die from the bundle and cut it out with a piece of white card stock. Then stamped with friends are like seashells stamps. I stamped them in crumb cake and blushing bride on white card stock. (there are large areas where the shells would be.) Then I lined it up with the seashells 3D embossing folder and ran that through the die machine. The shells came to life! They have such amazing texture! Using the stitched nested label dies I cut out another piece of white card stock and then stamped the sentiment. I attached it to a panel of neutral dsp and a white card base. I arranged the shells and used dimensionals to adhere the blushing bride shell.


This entire bundle is amazing! And with the embossing folder they really knocked it out of the park. The possibilities are endless and I can't wait to play more with it. It will make beautiful scrapbook pages also! If you purchase the bundle you can pick a saleabration item for FREE! So why not get it now! Have a blessed week, stay healthy and thank you for stopping by!


Beautiful Shells


Hello! I am sharing the card I made for my beautiful daughter for her birthday. She loves the beach and shells! I made the greeting a little different so it would be perfect for her! 
 

I stamped a few of the shells from the friends are like seashells, some of them I stamped full strength and used my brushes to add color and a few I used a few colors that I blended the colors on the stamps. I had a few scraps of the seaweed and so I also brushed some color on them. Continuing with the blending brushes I added a little balmy blue and crumb cake ink to the white panel. I then used a little splatter of frost white shimmer paint on the panel and a few of white ink refill. Attached it all to the card with the greeting that I customized. I used washi tape to block out the words I didn't want to stamp, stamped on the ink and then removed the tape. (those words did not have ink on them then). Finished with a few flowers for every season gems to resemble bubbles.


For the inside of the card I stamped the largest shell with blushing bride that I had stamped off 2 times. ( I stamped it on scratch paper to make the ink lighter) and then stamped the greeting in soft suede. It is always fun to add something to the inside of the card. Have a blessed day and I hope you come back soon. I would love any comments you might have.


Watercolor Wreath


Hi and so glad you are here. How are you all doing? Can you believe that it is Feb. already? Only a month left for saleabration. So don't miss out!  I am back with another Watercolor Wednesday project. This was a really quick and fun card to make. 
 

I started with a piece of fluid watercolor paper and ran it through my die machine with the wreath builder dies. You can water color before or after you die cut. I used water painters and ink refills to apply color. Letting it dry between layers to get more depth. After the final time it dried I splattered the leaves with left over ink. Then using the same die set yet a different wreath die I cut that out in basic white and adhered the pieces to wood panel from in good taste dsp and stamped the sentiment from celebrate sunflowers set. Finished with a white crinkled seam binding ribbon that I attached with mini glue dots.


Thank you for coming by today! Have a blessed day and I hope that you find some time to create a water color card.


Watercolored Dandelions


Welcome to another watercolor Wednesday! Thank you for joining me. Today I am trying a messy watercolor look. Even though it is messy and looks like it should be easy, I found it a little harder than expected. It had me really wanting to control the color, however I had to let go of that and just enjoy the color doing it's own thing.


- I started by gold embossing the dandelion from the garden wishes stamp set on Fluid watercolor paper. Using my water painters I applied  a light wash of smokey slate for background color. Then I painted the flowers with bright colors making sure to use a lot of water and to intentionally go out of the lines. After the first layer dried I went over and added more concentrated color.
- After it all dried I used the sentiment from heal your heart stamp set with basic grey ink. You can get this set for FREE if you purchase $50 or more. 
Try the messy watercolor look and let me know what you think?  Do you find it challenging to be messy? Thank you again for stopping by today! Have a blessed day!


-

Made with Love


Isn't this such a beautiful sentiment! It is from the garden wishes stamp set. I had so much fun creating this card today! I am really into splatter right now. Whether it is water, ink or shimmer paint, I am really into it. Try it!


- I white heat embossed with versamark ink the flowers from the garden wishes stamp set. Then using my blending brushes I rubbed in with balmy bluemisty moonlight and rich razzleberry ink
- I used white ink refillfrost white shimmer paint and water to make my splatter.
- I used the largest stitched rectangle die and cut out placing that on a piece of basic white card stock that I had embossed with the subtle embossing folder.
- White heat embossed the sentiment on black card stock and punched out with the tailored tag punch.
 

Thanks for stopping by today! Have a blessed day and stay healthy and safe! Check out the new mini catalog and don't forget about saleabration! Every $50 spent and you can pick from the saleabration catalog FREE items. If you sign up to be a demonstrator right now you will receive over $50 worth of card stock. Signing up is only $99 and you can pick $125 worth of product! Plus FREE shipping! Let me know if you have any questions. 


Love never fails!

 Hello! Do you enjoy making Valentine cards? I think they are one of my favorite kind of cards to make. Today's card is another fun card with the detailed hearts die and a fun and easy watercolor technique.


- Taping down a piece of shimmery white card stock with painter blue tape to a piece of cardboard, I wet the card stock with my largest painter pen. Then the fun part, using ink refills to put the color on. Blushing brideflirty flamingo and highland heather were the ink colors I used.
- Using the detailed hearts die I cut out the piece (after it dried).
-  The "love" heart is from the wreath builder dies and I used a little scrap I had of glitter paper from an old paper pumpkin to place behind the word.
- Finished with a piece of polka dot tulle and crinkled seam binding white ribbons.


I really appreciate you visiting my blog today. Have a wonderful day and stay healthy.


Simple Sunday


Happy Sunday! I am starting a new series called Simple Sunday. I will be posting very simple cards that you can create on your relaxing Sunday's. I hope you enjoy. My first card was created with the forever gold laser sheets. These make a quick and easy card because the main focal point is all done for you. 


- I started out with a piece of basic white card stock and splattered it with black ink and frost white shimmer paint after it dried I ran it through with the dainty diamond 3D embossing folder.
- I attached the gold wreath from the forever gold laser sheet.
- With the wreath builder dies I cut out the heart with real red card stock and a scrap of gold I had on my desk.
- I left the red "love" letters in and attached the gold letters on top with multipurpose liquid glue. Then attached the heart with mini dimensionals. The gold edge is another scrap that I had to add a little more gold to the card. ( I am an official scrap hoarder)


This card came together super fast and I love the pop of red with the gold. Thank you for stopping by and have a blessed Sunday. I hope you have time to create a simple Sunday card of your own!
Speaking of simple, nothing makes stamping easier than the paper pumpkin. All the work is done for you. If you order a 3 month subscription you can pick one of the FREE saleabration sets. With a 6 month you get your choice of one $100 FREE item or two $50 and with a 12 month you can pick 4 $50 FREE items or 2 $100 or any combination you would like plus you also receive hostess benefits and get $22 in FREE product in either of the current catalogs!  Don't miss out!


A wreath of Love


Hi! I have another card made with the arrange a wreath bundle (receive a 10% off when you purchase the bundle and a FREE saleabration item) and in good taste dsp. A check out the new stitched with whimsy dies! They are so fun! Speaking of fun I have been so much fun with the wreath dies also! I hope you don't get tired of all the cards I have made with them lately.


- Using the white heat embossing powder and versamark ink pad I stamped the wreath on the dark wood panel from the in good taste dsp
- Die cut the wreath and heart with the wreath builder dies. Used a scrap of card stock behind the word "love".
- Using the stitched with whismy die on the dark wood panel and then used paper trimmer to cut out panel.
-Attached all to a A2 (4 1/2 x 5 inch) card. Finished with a few of the hearts I had leftover from the card yesterday, a few sequins from the whale of a time sequins and a linen thread bow.
Thank you again for stopping by! I hope you find some time to be creative and stamp. It really does create serenity and calmness. Have a blessed day!


Global Design Project Challenge


Hi and welcome to my blog! If you are here for the first time I am so excited and happy you stopped by! My card today I created for the Global Design Project card challenge. What a talented bunch of designers! This week it was a theme challenge and with Valentine's Day right around the corner a love theme.
I am really loving arrange a wreath bundle! I love a stamp set that you can use year round and this one is it! Plus, who doesn't love a fun wreath. The other day I made a card with the detailed hearts die and I had many beautiful little hearts leftover and so I made a shaker card with them. My cards are usually simple so this was a little "extra" for me.


- Die cut the wreath and bow with arrange a wreath dies and the largest circle from the stitched shaped dies with the in good taste dsp (saving the inside of the circle for another project).
- With flirty flamingo ink and a blending brush I created a soft background for the hearts. 
- The greeting I created with the arrange a wreath stamp set, stamping on crumb cake card stock with crumb cake ink. The greeting is stamped in early espresso. After cutting it out I used my pinewood planks embossing folder to give it added texture.
- Finished the card off with the assembly of the shaker and a window sheet to create the fun shaker part.


Thank you again for stopping by and I hope you come back soon. Tomorrow I have another card I created with the arrange a wreath bundle. Check out and play along with the fun challenge on the Global Design Project. The designers have amazing "love " cards! Have a blessed day and stay healthy and stay in and stamp!


Valentine Watercolor


Hi! Welcome to my second watercolor Wednesday! Today's card does not require very much watercolor skills at all. It is a quick watercolor wash. So fun to do and I love that every time the results are different. The only hint is to pick colors that will not make mud. So that would be colors next to each other on the color wheel. For this card I picked melon mambo, highland heather and flirty flamingo.


- I started with a piece of fluid watercolor paper and attached it with blue painter tape to a piece of cardboard. I like to keep the cardboard pieces from the paper stacks for this.
- Using my water painter I put a generous amount of water down and then added the color. I let that layer dry and then added a second coat of color on top with a little less water.
- After it had all dried I splattered it with white ink refill and an old paint brush.
- Cut it out with detailed heart die and I left all the hearts in but 3. With the scraps I stamped a sentiment from ridiculously awesome in black ink and fussy cut it out.
- Punched with the heart punch a piece of vellum and made a white bow with white twine. Layering the card together all on basic white thick card stock.
Thank you for joining me today. Give the watercolor wash a try. It is really a fun way to play with color. Have a blessed day! Stay healthy and safe!