CAS(E) this sketch #334


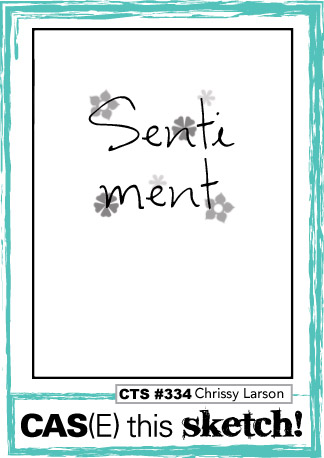
I have not had much time to stamp this week, so much going on these days, but I did want to play with the CAS(E) this sketch. I love this sketch and couldn't wait to play along. 


Since the new catalog and all the fun new sets I realized I have not given love to some of my older sets. (and now with the holiday catalog starting next month more new sets!) I love the painted harvest stamp set and so I used it for the card.


I used a few different colors for the flower and many layers, so saffron and daffodil delight for the larger layer and crushed curry and pumpkin pie for the inner petals. I learned from listening to one of Jennifer McGuire's videos about tips for layering stamps is to let each layer dry before placing the next layer.  A great tip and it really makes a difference. The colors stand out more.  I learn so much from her videos! She has so many!


It is important to take time for yourself and stamp a quick little card!  Join one of the many challenges out there. It is a fun way to get involved.
I kept this card fairly simple since I didn't have a lot of time and it really put me in the mood for fall!


Speaking of fall, Halloween will be here before we know it and the paper pumpkin will be "to die for"  haha my attempts to make a really bad joke. It will be super cute I am sure.  Goodies for your little trick or treaters! Have a great week and Enjoy!

Birds!


I am so crazy about birds right now.  I love all the different colors that God has created them. Lately I have been looking so closely at them on walks and online. I also love the way that many crafters color on crumb cake color card stock and grey card stock, not just white anymore. 


My coloring with pencils is a constant challenge, but I keep practicing. It is really important to color softly and in layers. I really enjoy how relaxing it is.
Don't forget if you would like to sign up to be a demonstrator to let me know or even if you have any questions.  I would love to answer any questions you may have. Have a great day! Enjoy!


Shaker card


Recently the TGIF website had a shaker card challenge, although I did miss the deadline I made the card anyway.  It has been a long time since I made a shaker card and I was up for the challenge. I CAS(E) my card from the Christmas card  (paper pumpkin) a few years ago. I really liked the layout and so it made the job of what to create so much easier.  


The floral essence set has stamp that I am pretty sure is suppose to be a stem, well in my card I used it as a stem.  I think it really gives the flower a different look than just using the flower bud by itself.  


I am really loving these sequins from the annual catalog and have almost used up the whole container already! They have been really going nicely with all the cards that I have been making lately and they really come alive with the cards and gifts I have made. I used the new stitched nested frame dies for the shaker part, also slightly obsessed with this set of dies! Take time to make a shaker card of your own. Have a great day! Enjoy!


Floral Essence and GDP #200


Another challenge for me this week. What a beautiful card to CASE. I love how soft her card is and so I wanted to have that same feel with my card and that is why I decided to add water with the aquapainter to my stamps after I had inked them up. I love this look.


The floral essence stamp set is great for this technique. The colors really blend nicely when stamped.


I also like the addition of sequins in the card by Janneke, so I just had to add those as well. I love how these lighter colored ones really pick up the colors in the card.


This card will make a pretty wedding card. I hope you enjoyed my spin on the amazing card created by Janneke de Jong. What an inspiration her stamped work is.

Embossing for texture


Coloring with my stampin blends is so relaxing and rewarding. Even though this stamp set has 2 other layers that you can stamp for quick and easy card, lately I have been coloring the image. I think because the petals are so nice and big it has a lot of room to color. After I have several images colored then comes the thought of what will I do with them. Sometimes I struggle with coming up with new ideas. Generally I will look through my old stampin up catalogs and find something that will work. Adding texture is something I really like to do and so when I saw an idea where they embossed the stamped image as the background I knew that was what I wanted.


I stamped one of the detail layers of the rose with versamark and heat embossed with clear embossing powder on crumb cake card stock. This added the texture and dimension that I wanted to add to the card. Because the way that I colored the flower was kind of busy I wanted to keep the rest of the card pretty simple. Where do you get inspiration for the projects that you create? Do you color your images with a project already in mind or do you color and then figure it out after? I would love to hear your thought process.  Enjoy!

Only a few days left to order. You must order by Aug 10th to get this cozy fall kit!


CAS(E) this Sketch! #332


I have been really trying to go outside of my comfort zone and challenge myself with my stamping. So I have been attempting to create for some of the challenge boards online. Today I created this card with the sketch from the CAS(E) this Sketch.


 Here is the sketch for this week. I am hoping that I get my card in on time, I am not the best with the computer so that is an even bigger challenge for me.


I used the bird ballad DSP and cut out a few of the cute feathers to put in my watering can. I slit a small hole in the top of the can to slip the feathers in. I colored the can with my stampin blends.


Cutting out the feather images made this card really fast. Thank you for checking out my card and give a challenge online a try. It is really fun to put your own spin on the sketches. Enjoy!

So Blessed and Grateful


What a beautiful sentiment this is and something so many times a day I take for granted! I am so blessed and grateful for all the time I get to spend creating and especially all the wonderful people I have met during my 20 plus years as a demonstrator for Stampin' Up! I began when I my 4 children were young and I wanted "adult" time. I have learned so much about myself and enjoyed the evolution of stamping.


I love a soft and sweet card. I think that this is one of my favorite cards that I have made in a long time. Starting with a watercolor panel using rococo rose and seaside spray the rest of the card developed.


As some of you who follow me on instagram, pinterest and my blog you know that I have really been trying to improve my watercolor skills. With this card I used a lot of techniques. One thing that I did was for the sentiment I used my aquapainter and dipped it into some of the rococo rose ink refill. I then brushed it over the sentiment and immediately stamped it. I really like the effect that it produced especially on the smaller font. It has a watery feel and compliments the rest of the card.


I used a panel of vellum to dull the watercolor panel down and it made a frame for the main image of the card.


I really had a lot of fun with this card and didn't think to hard when I was watercoloring. I sometimes over think the process and so this time I was able to just let go. Let me know what you think of the watercolor sentiment. Give it a try and let me know how it goes. Have a beautiful and blessed day! Enjoy!


Last day to take advantage of the bonus days.  Order $50 today and get a coupon to use next month for $10.  A great time to order paper and adhesive! Let me know if you have any questions!


Light and fluffy clouds


I needed a box for a small gift and so I turned to the cute little pizza boxes from Stampin' Up! I love the cute shape and the convenience of them already to use, just a few simple folds and you have the box assembled. I had colored, with my stampin blends, this bird a few days ago and thoughts it was the perfect size to go on my box. 


After I had put the box together I realized that the upper left corner needed something. I tried a sentiment and many other things but it all was just too much. I had the idea to add a few clouds but wasn't sure how. I did not want to add embossing paste because I thought that would also be to heavy for that corner. Then I had the idea to use my cloud stencil with my colorless blender. I loved it!


Because the colorless blender pushes the color over and makes it lighter the cloud effect was beautiful and just what I wanted, light and fluffy clouds. I am sure that I am not the first person to think of this idea but, I was really excited when I did. I know that the photos are not the best, I tried to get the best shot that I could. I finished the box with using dimensionals on the flowers and the enjoy banner from the country home stamp set.


I kept the box pretty simple other than the main panel. Sometimes you have to look through your supplies and see what might work. Remembering that it is only paper and you can try over if you don't like the results.  You might come up with a result that you are really happy with, like I did today. I would love to hear what things you have discovered while creating. I hope you give my clouds a try. I think that you will really like them. I know that I will try this again with other images and see what other  results I can come up with. Let me know what you think of my pizza box?  Enjoy!


Only a few days left to both of these deals.  Let me know if you need any help or have any questions!

Perennial flower punch


I am so in love with this new punch and coordinating stamp! I know I have used it a lot lately, and I am hoping you like the ideas that I have some up with.  Most of them are pretty basic and easy but I think that is what I like most.  Quick and easy!


I love to white heat emboss images and watercolor them! These images took me no time because they are so small. I stamped them a few times with versamark ink and then embossed them on watercolor paper. I used mostly bermuda bay ink and pool party for the flower colors. Every time I use bermuda ink and paper I wonder why I don't use it more often. I love the color!


For the leaves I decided to stamp the same flower on pear pizzazz. For the card base I used bermuda and swiped my white ink pad across it for a subtle look.  I love this technique. If is kind of hard to see it in my pictures but in person it looks so soft and pretty. The greeting is from the free as a bird stamp set and the die I used to cut that out is from the stitched label dies. This die set has great dies for sentiments. If you have not gotten this bundle yet, I would highly suggest it! The price is affordable and you can use it in so many different ways.  Let me know what you have done with this bundle.  Enjoy!


Try something new!


I love the flower and leaf dies that are in the wild rose die set so I decided to make them the star for this card. I wanted the color to  pop through the dies and so I watercolored with my ink refills and aquapainter the background. I started by placing the dies where I wanted them to go and then added the color.


The first layer of color was so pretty and I was really excited to see what the card would look like when done. I placed my dies on top and decided that I wanted to add another layer of color and make some areas a little bigger. I also added some of the seaside spray to the background to add even more dimension.


Look how pretty is this.  I thought of just keeping this without the dies but decided to make the card the way that I had planned.


The sentiment is from the inspiring iris stamp set.  I really love this sentiment and I am sure you have noticed because I use it all the time!


I wonder if I had made the die pieces with colored card stock how that would look.  Something to try in the future. I love to try new things. How about you? Sometimes you can come up with something that works and sometimes it just doesn't work.  I keep trying to tell myself that it is all just paper and ink. Try something new today and let me know what it is and if you like it. Enjoy!